MikroTik Cloud Hosted Router Images in ContainerLab
Pining for turkey and stuffing, I settled for containers and VMs instead. In the process, I've offered some advice on better use of RouterOS in ContainerLab.

(Update 2026-01-14: Referenced the new long-term RouterOS version in the update section and added optional Docker image tagging.)
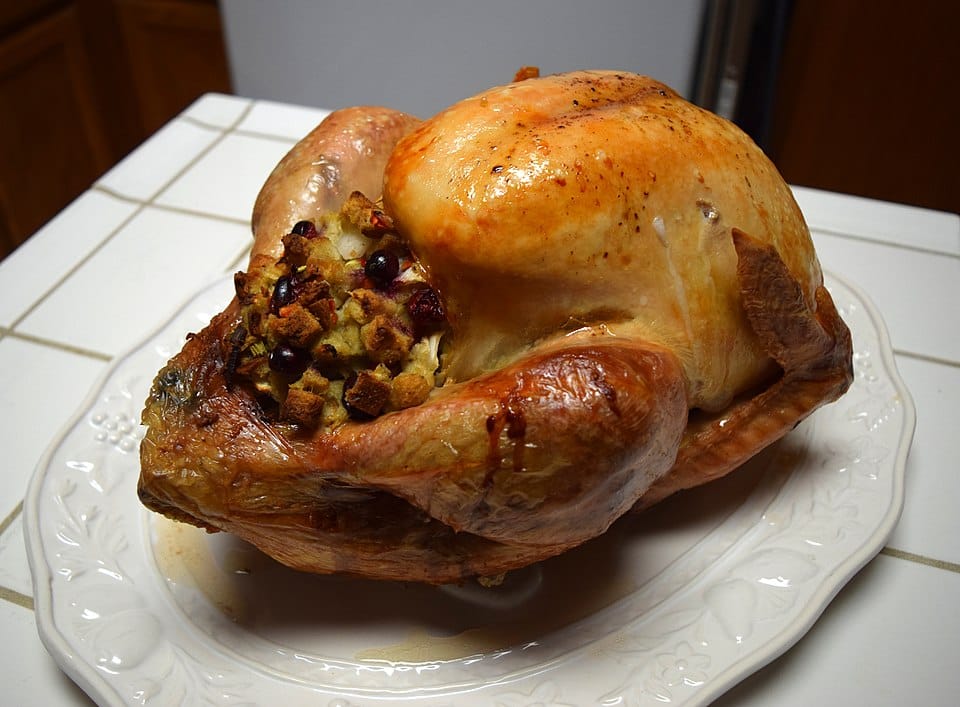
It's a slow day in the office. My US customers are busy gorging themselves with all of the good food that goes with US Thanksgiving and I'm not at all jealous. Really. I'm not. (Sigh.) Okay, I'm flat-out lying.
While I try to avoid thinking of turkey filled with delicious stuffing, I'll try to distract myself by likening that to containers filled with functional VMs. It's not a perfect analogy, but it will have to do.
Over the last little while, I've been migrating my networking labs from EVE-NG to ContainerLab, mostly because I really like the idea of pre-building my topologies and device configurations in templates rather than dragging and dropping new connections every time I want to to build something. That write-up will come soon, but for now I want to do a quick outline of what I did to make MikroTik's Cloud Hosted Router (CHR) easier to work with in this setup.
Using vrnetlab To Host a MikroTik CHR
Per the name of the product, ContainerLab works best with containers. This introduces an additional step if we want to include device images that run as VMs, like our MikroTik CHR. Thanks to vrnetlab, which wraps VM-based devices in a QEMU container, we can integrate these into our ContainerLab setups too.
RouterOS is available as a freely-downloadable VM (speed limited without licensing) from the MikroTik web site and is easily integrated into ContainerLab using the vrnetlab wrapper... if we only want the basics.
Optional RouterOS Packages
MikroTik devices and, by extension their virtual appliance, have a number of additional packages that provide functionality beyond what is shipped with the core RouterOS image. These are usually installed as needed after the device has completed its initial startup.
When we're using interactive products like EVE-NG, this isn't a problem because we can just add the packages as part of the setup. Using ContainerLab, the ideal is to be able to prescriptively define everything we need and bring it up at once without any need for additional interactive configuration. We want to get the lab up and running and get started without any further manual work.
This requires a change in our normal vrnetlab build, so let's go about it.
Build Steps
I'm going to assume that you already have ContainerLab installed, that Docker is running and that you're using a user that is set up to manage your ContainerLab installation. If you haven't got that far, I recommend taking a break to get that set up first. These next steps will break (and, frankly, aren't all that useful) without that in place.
Get vrnetlab
We'll start by using git to clone vrnetlab into our ContainerLab host.
clab@clab-0:~$ git clone https://github.com/srl-labs/vrnetlabCloning into 'vrnetlab'...
remote: Enumerating objects: 6143, done.
remote: Counting objects: 100% (63/63), done.
remote: Compressing objects: 100% (55/55), done.
remote: Total 6143 (delta 22), reused 18 (delta 8), pack-reused 6080 (from 3)
Receiving objects: 100% (6143/6143), 2.60 MiB | 9.21 MiB/s, done.
Resolving deltas: 100% (3599/3599), done.
Get the CHR Image
Then we'll enter vrnetlab's working directory and get the MikroTik CHR image. Version 7.20.4 is current at the time of writing, so adjust the chrVersion variable if it isn't at the time of reading.
clab@clab-0:~$ cd vrnetlab/mikrotik/routerosclab@clab-0:~/vrnetlab/mikrotik/routeros$ cd vrnetlab/mikrotik/routeros
clab@clab-0:~/vrnetlab/mikrotik/routeros$ export chrVersion=7.20.4; \
chrImage=chr-$chrVersion.vmdk.zip; \
wget https://download.mikrotik.com/routeros/$chrVersion/$chrImage && \
unzip $chrImage && \
rm $chrImage
--2025-11-27 15:42:35- https://download.mikrotik.com/routeros/7.20.4/chr-7.20.4.vmdk.zip
Resolving download.mikrotik.com (download.mikrotik.com)... 2a02:610:7501:3000::251, 159.148.147.251
Connecting to download.mikrotik.com (download.mikrotik.com)|2a02:610:7501:3000::251|:443... connected.
HTTP request sent, awaiting response... 200 OK
Length: 43380520 (41M) [application/zip]
Saving to: ‘chr-7.20.4.vmdk.zip’
chr-7.20.4.vmdk.zip 100%[==================>] 41.37M 6.75MB/s in 6.4s
2025-11-27 15:42:43 (6.42 MB/s) - ‘chr-7.20.4.vmdk.zip’ saved [43380520/43380520]
Archive: chr-7.20.4.vmdk.zip
inflating: chr-7.20.4.vmdk
This will leave us with a single chr-7.20.4.vmdk file. If we were building a basic RouterOS image for vrnetlab, we could just run "make" here , the script would load the image into Docker, and we would be ready to deploy labs. I want to make sure we have all of the optional functionality I mentioned earlier, so we're going to take some extra steps first.
Install QEMU
The changes we're making to the base image require that we run the CHR as a VM for a short period and we're going to need a hypervisor for that. I'm running Debian 12 (Bookworm) for my ContainerLab system, so the commands I'll use for this may be different from what you're using, but as long as you have QEMU available when you're done, we're good.
clab@clab-0:~/vrnetlab/mikrotik/routeros$ sudo apt install qemu-systemReading package lists... Done
Building dependency tree... Done
Reading state information... Done
The following NEW packages will be installed:
qemu-system
0 upgraded, 1 newly installed, 0 to remove and 3 not upgraded.
Need to get 51.2 kB of archives.
After this operation, 79.9 kB of additional disk space will be used.
Get:1 http://mirror.csclub.uwaterloo.ca/debian bookworm/main amd64 qemu-system amd64 1:7.2+dfsg-7+deb12u16 [51.2 kB]
Fetched 51.2 kB in 0s (510 kB/s)
Selecting previously unselected package qemu-system.
(Reading database ... 76365 files and directories currently installed.)
Preparing to unpack .../qemu-system_1%3a7.2+dfsg-7+deb12u16_amd64.deb ...
Unpacking qemu-system (1:7.2+dfsg-7+deb12u16) ...
Setting up qemu-system (1:7.2+dfsg-7+deb12u16) ...
Launch the CHR Image
First, we'll rename the image to differentiate it from the base image. Depending on your needs, you may want to have both the base image and one with all of the optional packages installed.
clab@clab-0:~/vrnetlab/mikrotik/routeros$ mv chr-$chrVersion.vmdk \chr-$chrVersion-full.vmdk
Next, we'll launch the CHR image under QEMU.
clab@clab-0:~/vrnetlab/mikrotik/routeros$ sudo qemu-system-x86_64 \-enable-kvm \
-m 256 \
-nic user,model=virtio \
-drive file=chr-$chrVersion-full.vmdk,media=disk,if=virtio \
-nographic
Login To the CHR
The CHR will start up and we'll be presented with a login prompt. The default username on a CHR is "admin" and there is no default password, so just hit enter for this.
MikroTik 7.20.4 (stable)MikroTik Login: admin
Password:
Once we're in, we'll see the splash screen and a prompt asking if we want to read the license. I've read it before, so I skip that part.
RouterOS 7.20.4 (c) 1999-2025 https://www.mikrotik.com/Do you want to see the software license? [Y/n]: n
Next we'll be prompted to change the password. We won't be keeping the system configuration when we're done here, so there's not much point. Just press Ctrl-C to skip this and go to the initial prompt.
Change your passwordnew password>
[admin@MikroTik] >
Add Optional Packages
Next, we'll install all of the optional packages.
[admin@MikroTik] > /system/package[admin@MikroTik] /system/package> update/check-for-updates
channel: stable
installed-version: 7.20.4
latest-version: 7.20.4
status: System is already up to date
We just downloaded the image moments ago, so there won't likely be any updates but the check will update the packages list, which is the important part. Executing the "print" command in the /system/packages context will show us all of the packages, marked as disabled but available.
[admin@MikroTik] /system/package> printFlags: X - DISABLED; A - AVAILABLE
Columns: NAME, VERSION, BUILD-TIME, SIZE
# NAME VERSION BUILD-TIME SIZE
0 routeros 7.20.4 2025-11-05 12:07:41 19.1MiB
1 XA calea 24.1KiB
2 XA container 172.1KiB
3 XA dude 1396.1KiB
4 XA gps 24.1KiB
5 XA iot 548.1KiB
6 XA openflow 80.1KiB
7 XA rose-storage 3500.1KiB
8 XA tr069-client 160.1KiB
9 XA ups 36.1KiB
10 XA user-manager 408.1KiB
11 XA wireless 1148.1KiB
There are a number of packages here that will probably never be needed in a ContainerLab installation, but I'm not going to second guess your requirements. Let's just enable them all, verify that they're scheduled, and apply the changes.
[admin@MikroTik] /system/package> enable [find][admin@MikroTik] /system/package> print where scheduled="scheduled for install"
Flags: X - DISABLED; A - AVAILABLE
Columns: NAME, SCHEDULED, SIZE
# NAME SCHEDULED SIZE
1 XA calea scheduled for install 24.1KiB
2 XA container scheduled for install 172.1KiB
3 XA dude scheduled for install 1396.1KiB
4 XA gps scheduled for install 24.1KiB
5 XA iot scheduled for install 548.1KiB
6 XA openflow scheduled for install 80.1KiB
7 XA rose-storage scheduled for install 3500.1KiB
8 XA tr069-client scheduled for install 160.1KiB
9 XA ups scheduled for install 36.1KiB
10 XA user-manager scheduled for install 408.1KiB
11 XA wireless scheduled for install 1148.1KiB
[admin@MikroTik] /system/package> apply-changes
Apply scheduled changes and reboot device? [y/N]:
y
system will reboot shortly
Verify Packages
We'll repeat the same login process we went through when we first launched the CHR. Just as before, there's no need to actually set an admin password. We'll be resetting the configuration when we're done here, so there's no point.
Next, we'll switch to the /system/package context and verify that the packages are installed.
[admin@MikroTik] > /system/package[admin@MikroTik] /system/package> print
Columns: NAME, VERSION, BUILD-TIME, SIZE
# NAME VERSION BUILD-TIME SIZE
0 tr069-client 7.20.4 2025-11-05 12:07:41 160.1KiB
1 ups 7.20.4 2025-11-05 12:07:41 36.1KiB
2 dude 7.20.4 2025-11-05 12:07:41 1396.1KiB
3 iot 7.20.4 2025-11-05 12:07:41 548.1KiB
4 calea 7.20.4 2025-11-05 12:07:41 24.1KiB
5 wireless 7.20.4 2025-11-05 12:07:41 1148.1KiB
6 gps 7.20.4 2025-11-05 12:07:41 24.1KiB
7 container 7.20.4 2025-11-05 12:07:41 172.1KiB
8 user-manager 7.20.4 2025-11-05 12:07:41 408.1KiB
9 openflow 7.20.4 2025-11-05 12:07:41 80.1KiB
10 routeros 7.20.4 2025-11-05 12:07:41 19.1MiB
11 rose-storage 7.20.4 2025-11-05 12:07:41 3500.1KiB
If we see output similar to the above, everything is loaded and good to go.
Reset the CHR's Configuration
Once we have verified that the packages have been installed, we'll reset the CHR's configuration and shut it down to prepare it for the vrnetlab process.
[admin@MikroTik] /system/package> /system/reset-configuration keep-users=no skip-backup=yes no-defaults=yes shutdown=yesThe VM will now shut down and QEMU will drop us back to our vrnetlab prompt.
Run vrnetlab
Now that the VM image is fully prepared with all of the optional packages, we can run "make" to produce the Docker image.
clab@clab-0:~/vrnetlab/mikrotik/routeros$ makefor IMAGE in chr-7.20.4-full.vmdk; do \
echo "Making $IMAGE"; \
make IMAGE=$IMAGE docker-build; \
make IMAGE=$IMAGE docker-clean-build; \
done
Making chr-7.20.4-full.vmdk
make[1]: Entering directory '/home/clab/vrnetlab/mikrotik/routeros'
--> Cleaning docker build context
rm -f docker/*.qcow2* docker/*.tgz* docker/*.vmdk* docker/*.iso docker/*.xml docker/*.bin
rm -f docker/healthcheck.py docker/vrnetlab.py
Building docker image using chr-7.20.4-full.vmdk as vrnetlab/mikrotik_routeros:7.20.4-full
make IMAGE=$IMAGE docker-build-image-copy
make[2]: Entering directory '/home/clab/vrnetlab/mikrotik/routeros'
cp chr-7.20.4-full.vmdk* docker/
make[2]: Leaving directory '/home/clab/vrnetlab/mikrotik/routeros'
(cd docker; docker build --build-arg http_proxy= --build-arg HTTP_PROXY= --build-arg https_proxy= --build-arg HTTPS_PROXY= --build-arg IMAGE=chr-7.20.4-full.vmdk --build-arg VERSION=7.20.4-full --label "vrnetlab-version=$(git log -1 --format=format:"Commit: %H from %aD")" -t vrnetlab/mikrotik_routeros:7.20.4-full .)
[+] Building 1.2s (9/9) FINISHED docker:default
=> [internal] load build definition from Dockerfile 0.0s
=> => transferring dockerfile: 632B 0.0s
=> [internal] load metadata for public.ecr.aws/docker/library/debian:boo 0.1s
=> [internal] load .dockerignore 0.0s
=> => transferring context: 2B 0.0s
=> [1/4] FROM public.ecr.aws/docker/library/debian:bookworm-slim@sha256: 0.0s
=> [internal] load build context 1.0s
=> => transferring context: 54.58MB 1.0s
=> CACHED [2/4] RUN apt-get update -qy && apt-get upgrade -qy && a 0.0s
=> CACHED [3/4] COPY chr-7.20.4-full.vmdk* / 0.0s
=> CACHED [4/4] COPY *.py / 0.0s
=> exporting to image 0.0s
=> => exporting layers 0.0s
=> => writing image sha256:d64071a1b69ee55741cbf790a1cfcd8cb8f0b756171fb 0.0s
=> => naming to docker.io/vrnetlab/mikrotik_routeros:7.20.4-full 0.0s
make[1]: Leaving directory '/home/clab/vrnetlab/mikrotik/routeros'
make[1]: Entering directory '/home/clab/vrnetlab/mikrotik/routeros'
--> Cleaning docker build context
rm -f docker/*.qcow2* docker/*.tgz* docker/*.vmdk* docker/*.iso docker/*.xml docker/*.bin
rm -f docker/healthcheck.py docker/vrnetlab.py
make[1]: Leaving directory '/home/clab/vrnetlab/mikrotik/routeros'
Verify That the Docker Image is Present
A quick run of "docker image ls" shows our new image is available for ContainerLab.
clab@clab-0:~/vrnetlab/mikrotik/routeros$ docker image lsIMAGE ID DISK USAGE
vrnetlab/mikrotik_routeros:7.20.4 8a0d0999e393 985MB
vrnetlab/mikrotik_routeros:7.20.4-full 166935d22ff9 985MB
Additional Tagging (Optional)
I like to add additional tags to my ContainerLab images to avoid having to change my YAML files every time I update. If there was a previous version with additional tags added, those will need to be removed before the tags are applied to another image.
clab@clab-0:~/vrnetlab/mikrotik/routeros$ docker image rm vrnetlab/mikrotik_routeros:stableclab@clab-0:~/vrnetlab/mikrotik/routeros$ docker image rm vrnetlab/mikrotik_routeros:stable-full
clab@clab-0:~/vrnetlab/mikrotik/routeros$ docker image ls
IMAGE ID DISK USAGE
vrnetlab/mikrotik_routeros:7.20.4 8a0d0999e393 985MB
vrnetlab/mikrotik_routeros:7.20.4-full 166935d22ff9 985MB
clab@clab-0:~/vrnetlab/mikrotik/routeros$ docker tag 8a0d0999e393 vrnetlab/mikrotik_routeros:stable
clab@clab-0:~/vrnetlab/mikrotik/routeros$ docker tag 166935d22ff9 vrnetlab/mikrotik_routeros:stable-full
clab@clab-0:~/vrnetlab/mikrotik/routeros$ docker image ls
IMAGE ID DISK USAGE
vrnetlab/mikrotik_routeros:7.20.4 8a0d0999e393 985MB
vrnetlab/mikrotik_routeros:7.20.4-full 166935d22ff9 985MB
vrnetlab/mikrotik_routeros:stable 8a0d0999e393 985MB
vrnetlab/mikrotik_routeros:stable-full 166935d22ff9 985MB
Updates
It's worth mentioning that upgrading the image is relatively easy. Just start the QEMU process again with the same "chr-7.20.4-full.vmdk" file that we left in ~/vrnetlab/mikrotik/routeros and follow the steps for installing the optional packages up to checking for updates. When we reach that point, we can install the update to RouterOS and all installed packages.
As of this post's current edit, 7.20.7 has been released as the new long-term version of RouterOS, so let's update to that.
[admin@MikroTik] > /system/package/update[admin@MikroTik] /system/package/update> set channel=long-term
[admin@MikroTik] /system/package/update> check-for-updates
channel: long-term
installed-version: 7.20.4
latest-version: 7.20.7
status: New version is available
[admin@MikroTik] /system/package/update> install
The VM will then reboot and come up with the updates installed. We can then reset the configuration like we did before.
[admin@MikroTik] /system/package> /system/reset-configuration keep-users=no skip-backup=yes no-defaults=yes shutdown=yesAt this point, we can rename the vmdk image to reflect the update and run "make" again to deploy the update image to our ContainerLab's Docker installation.
clab@clab-0:~/vrnetlab/mikrotik/routeros$ mv chr-7.20.4-full.vmdk \chr-7.20.7-full.vmdk
clab@clab-0:~/vrnetlab/mikrotik/routeros$ make
Tagging (Optional)
The previous version we were working with was the stable version. We'll set up separate tagging for the new long-term version.
clab@clab-0:~/vrnetlab/mikrotik/routeros$ docker image rm vrnetlab/mikrotik_routeros:long-termclab@clab-0:~/vrnetlab/mikrotik/routeros$ docker image rm vrnetlab/mikrotik_routeros:long-term-full
clab@clab-0:~/vrnetlab/mikrotik/routeros$ docker image ls
IMAGE ID DISK USAGE
vrnetlab/mikrotik_routeros:7.20.7 911cc9de7201 976MB
vrnetlab/mikrotik_routeros:7.20.7-full 60999516775b 1.01GB
clab@clab-0:~/vrnetlab/mikrotik/routeros$ docker tag 911cc9de7201 vrnetlab/mikrotik_routeros:long-term
clab@clab-0:~/vrnetlab/mikrotik/routeros$ docker tag 60999516775b vrnetlab/mikrotik_routeros:long-term-full
clab@clab-0:~/vrnetlab/mikrotik/routeros$ docker image ls
IMAGE ID DISK USAGE
vrnetlab/mikrotik_routeros:7.20.7 911cc9de7201 976MB
vrnetlab/mikrotik_routeros:7.20.7-full 60999516775b 1.01GB
vrnetlab/mikrotik_routeros:long-term 911cc9de7201 976MB
vrnetlab/mikrotik_routeros:long-term-full 60999516775b 1.01GB
The Whisper in the Wires:
Custom Images Offer Better Lab Flexibility
Now that we have a source image that contains all of the optional packages, we have much more ability to build predefined labs without having to be concerned about whether we need to do optional package installations. If we want to add a node that uses User Manager features or The Dude, that is now available to us without having to manually perform package installations and paste supplemental configurations after deployment.
I hope you find this useful as you explore RouterOS labbing with ContainerLab.